
The first mistake I made was tackling another home project with my husband. We have great chemistry in the sack, and he can make me laugh like no one else; however, we should never A) work together and B) play in a band together. Don’t get me wrong, we actually produce quite good results in both situations; he’s just a pompous, impatient asshole along the way. I’ll give you an example: He once found himself sitting in the apartment of a famous celebrity film critic, whose name may rhyme with Beffry Shymons, and when my dear husband expressed how unimpressed he was with (insert famous-award-winning-movie-here), the critic replied under his breath, “Well, you’re not the film critic,” to which James rebutted, “I’m not?! You just get paid for it.”
Touché, my love, touché.
Anyway, I digress. We do projects together, we fight and curse each other out, he gets a little pompous and snooty, and I get a little stubborn. But, in the end we make beautiful things and swear we’ll never do it again, until we do it again.
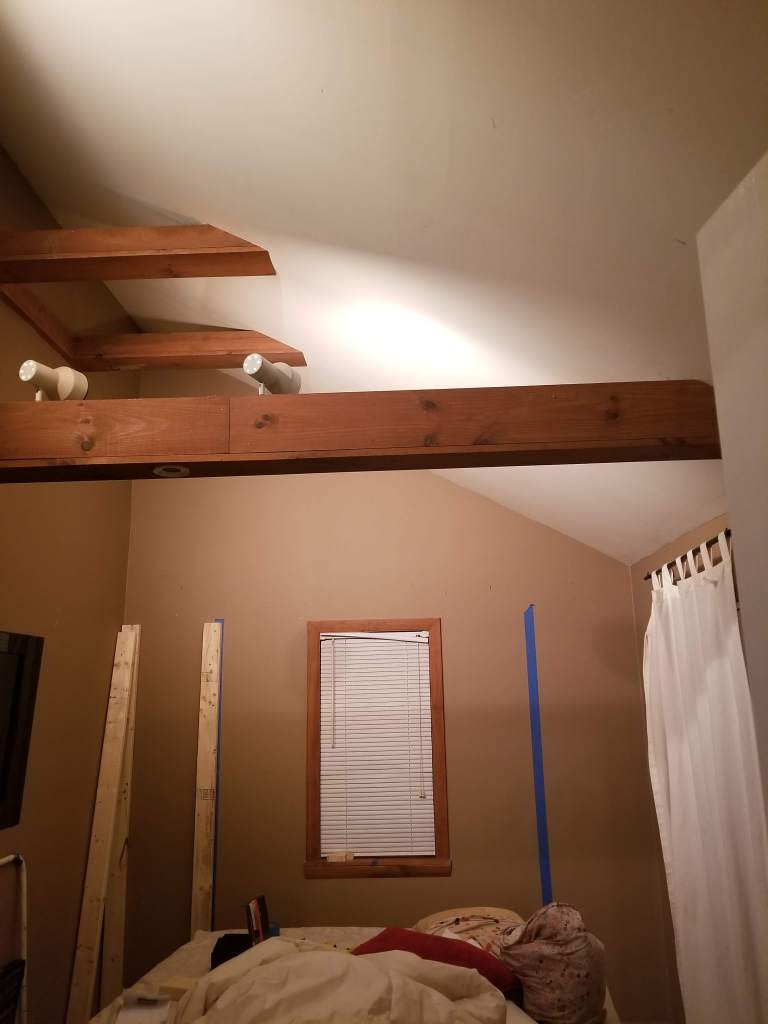
In reality our small bedroom really needed a makeover. Smarter space for our things, a much more cozy hideaway from the rest of the house. A sanctuary amongst the noise (READ: moody preteen). When we bought our home in 2015, it was a one-bedroom. A tiny 950 sq foot open ranch, a sort of 70’s-feel bachelor hideaway in the woods of the Hudson Valley with one big main master bedroom that took up the entire width of the house. We did have a preschooler, so indeed a 2nd bedroom was in order because we are not psychopaths. Before we moved in, we decided to erect a wall in the middle of the giant master, add a 2nd doorway, and voila! A 2-bedroom home for the price of one.
This split though, made both bedrooms quite small, about 9 feet by 18 feet each. The high open-beamed ceilings, however, never made it feel claustrophobic, even though for the first five years I had to shimmy my pudgy body past the TV to get to my side of the bed every night. For Charlotte’s room we eventually built a high sleeping loft last year, but for our room a loft was quickly nixed. I’ve seen enough episodes of Tiny House Living to acknowledge that climbing a ladder just to crawl onto your floor mattress is a bitch for anyone over the age of 13.

So browsing through Pinterest one day, I came across built-ins that surround the bed in a headboard bookcase type of situation. Beautifully crafted nooks for a sole brass statue of a Buddha dog meditating, another cubby to display a single framed family beach photo … yeah sure, my life exactly right now and super practical in a small home that certainly does not have enough closets, let alone display space. But the built-in intrigued me. I could move my bed around, get rid of our Ikea nightstands from 2006 (I’m serious, they have actually lasted that long, ha!), build multiple cubbies, and fill them with cute baskets to hide our messy mismatched belongings.
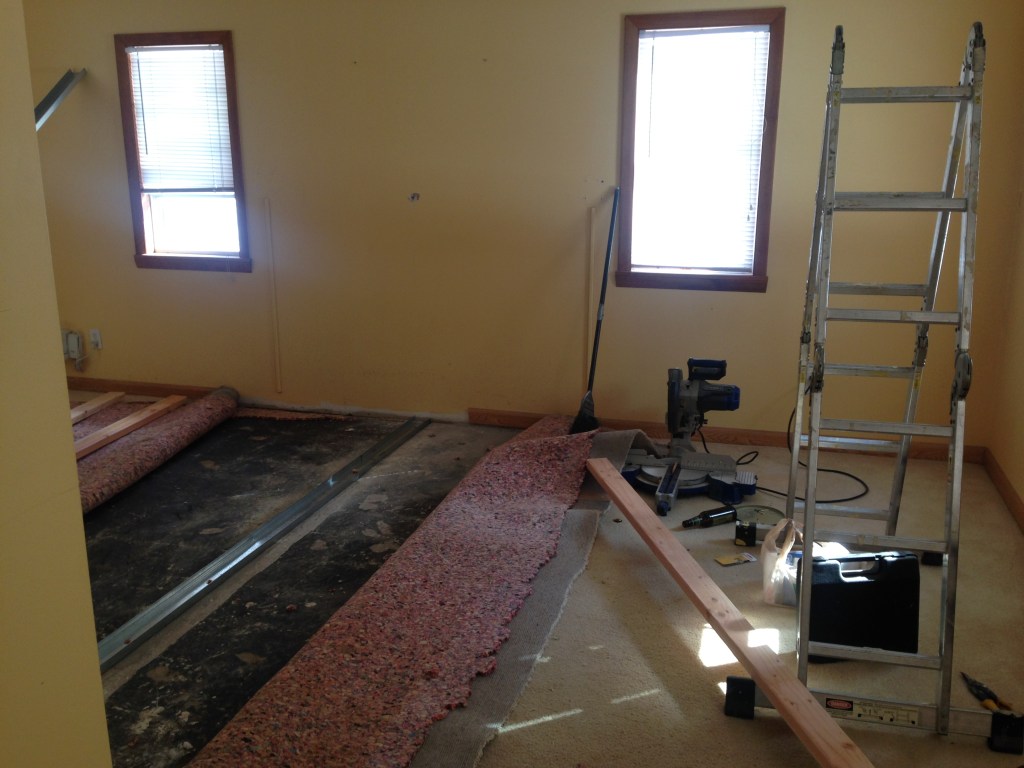
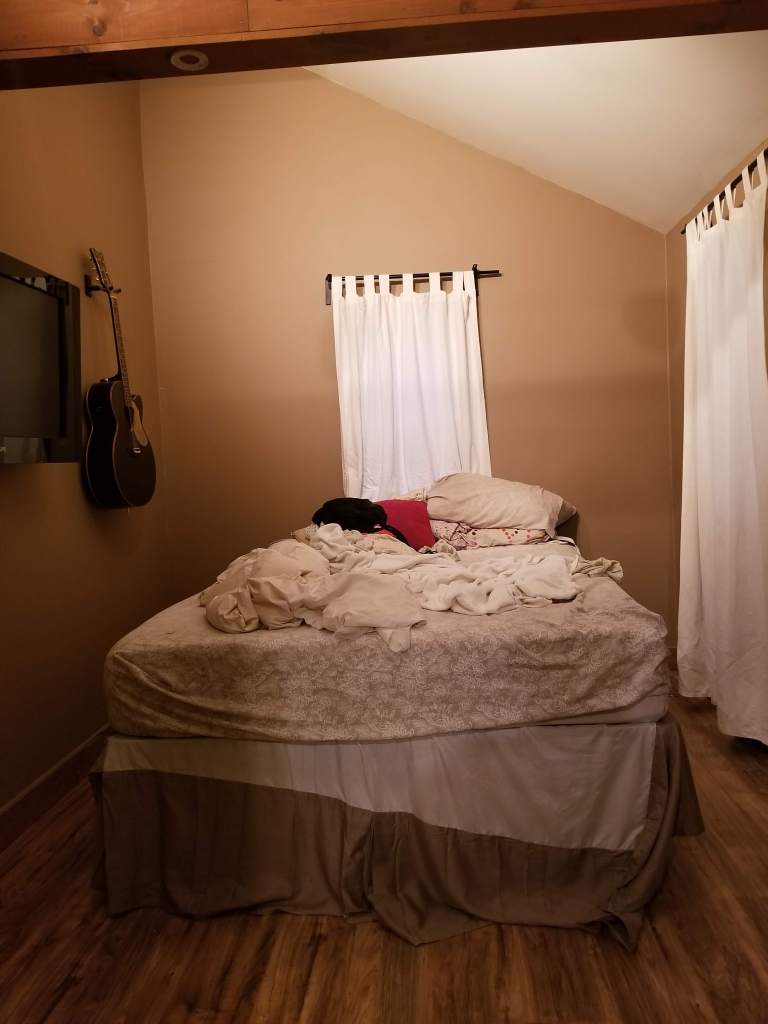
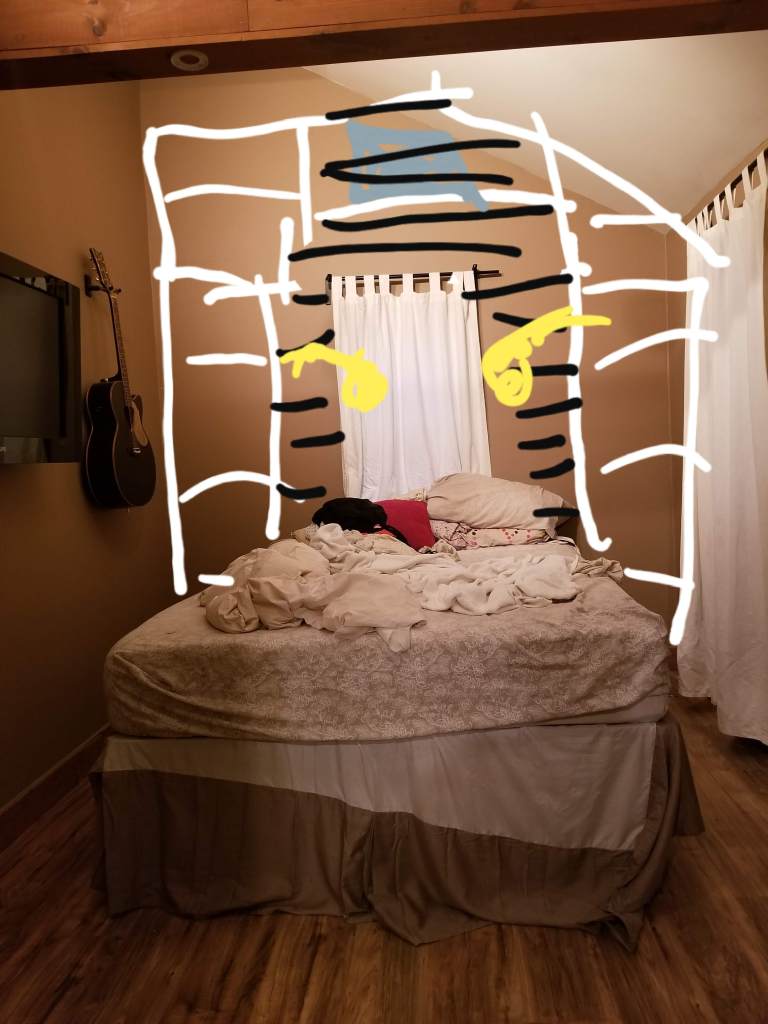
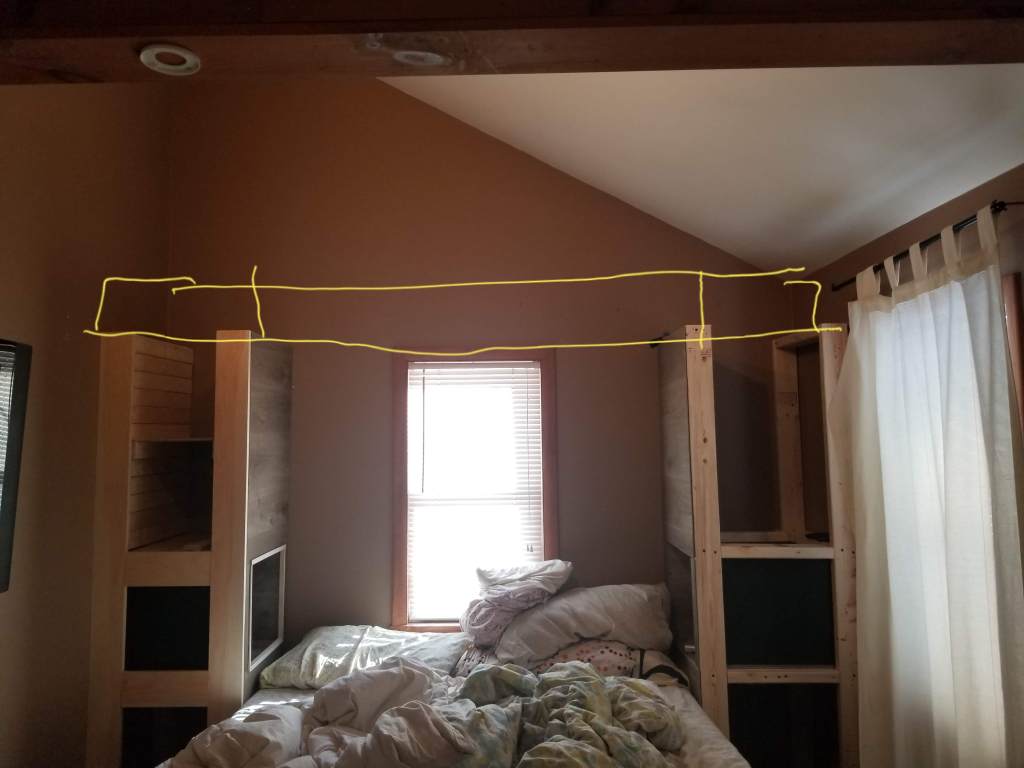
I was officially excited. I had my husband move everything out of the room, I snapped a pic of the before, and presented him with my detailed to-spec plan:
Hahaha, he shot me a look of disdain, so to boost his confidence in me I showed him my Pinterest inspirations, his eyes got wide, and he said, and I quote, ” Uh, we can’t build that. I mean, we can, but it won’t look anything like that when we’re done… ok?” Sold! I knew whatever we made would be better than what we had now, and with his knack for YouTubing everything from drilling pilot holes to fixing Ford F150 steering column issues, I knew we were on our way… to something.
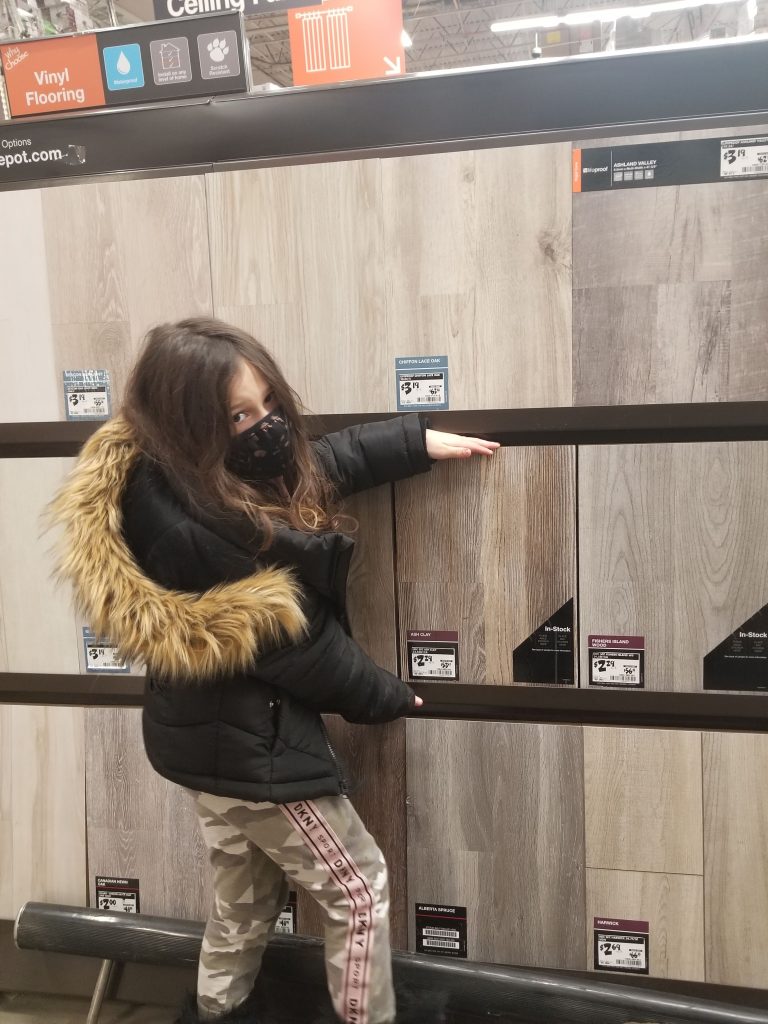
So we just took measurements of the room minus the measurements of our queen-size bed and started browsing material at old faithful, Home Depot. We really had no idea of what materials we needed, and mistakes were made. The original plan was white shiplap for the fronts, and wood planks for the walls/headboard/nightstand cubby. The best advice I can give you is to lie. Don’t tell the photographer he’s hired for a wedding; it’s just a party. Don’t tell the catering hall it’s a Sweet 16; it’s just a birthday. The same goes for home improvements. Don’t shop for “shiplap” or “wood wall covering”, look for materials that look like it or make it yourself, and make it work. I can’t tell you how overpriced horizontal finished wood panels are that are marketed for walls. Stupid. It’s just flooring or wood on a vertical surface?!
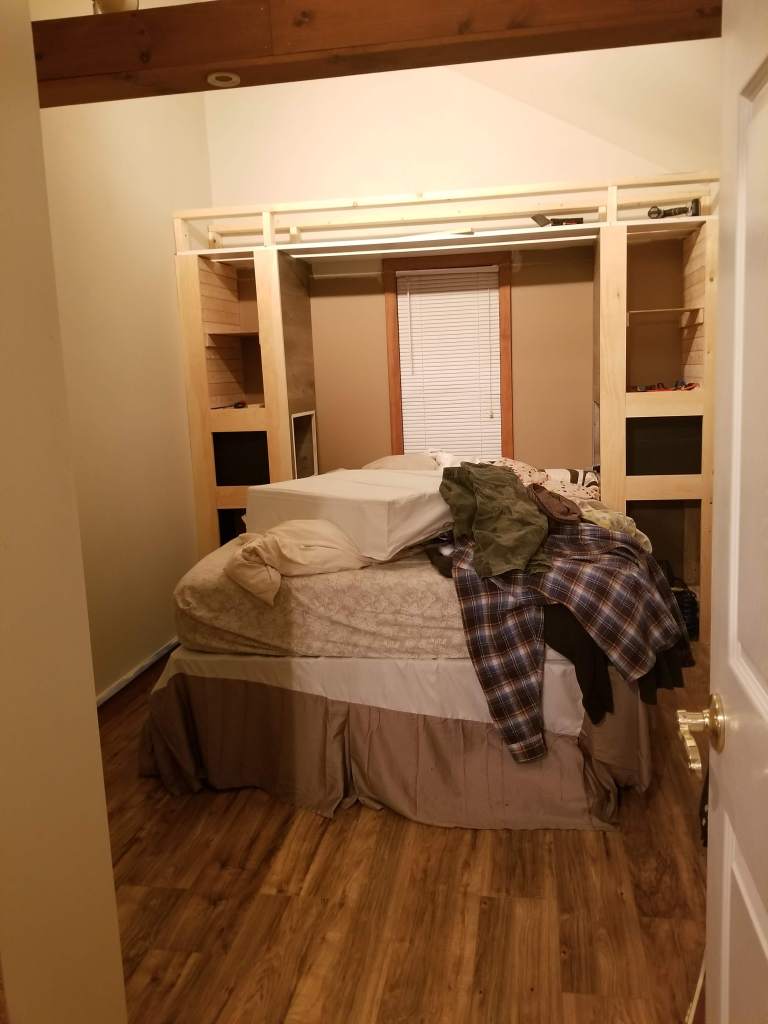
2 x 4’s are your friends. Buy it by the pallet load. You’ll use them. That was the base of our bookshelf headboard. We cut some down to the general height we needed and propped them on either side of the bed and stood back to observe.
Then we just started winging it. 2 x 4’s screwed into the next, each cut down to size. Just keep in mind the height of your side table ‘cubbies’ in relation to your mattress and start boxing everything out. Repeat for the other side of the bed. Think ahead of where you want your reading lights and add a 2 x 4 across there so you have something to screw into.
Make sure you anchor your headboard bookcase thing to the wall, either the side or back. I’m not going to give you advice on studs vs anchors, cause yeah, do your diligence and do what you’re comfortable with. But man, you don’t want that thing toppling down during nookie (or monkeys jumping on the bed for that matter.)

The flooring we chose for the headboard was also what we were using for inside the night stand cubbies, which saved on materials. Why line the backs with wood or Sheetrock? If you’re not attaching anything to it, just use the vinyl flooring planks if they’re stiff enough for the bottom and sides and save money (and time).
Oops. My mistake. The DIY shiplap looked like shit. I credit James (pompous and snooty) with putting a stop to this project at this moment because I (stubborn) would have kept going wearing my rose-tinted glasses and (maybe) made it work in the end. We bought cheap pre-painted pine boards at 3/4″ thick, and it was just looking…cheap? Unfinished? Bootlegged? All of the above I’m afraid.
Remember how I said James was a pompous asshole? That’s the only reason why this project was not a total cheesy disaster. He realized it was subpar, reined it in, kept it in check, and was like, ‘let’s reassess.’ That’s important. Just because you spent X amount of dollars or time does not mean you have to continue on the same path. So we decided our version of shiplap was not working. We chose to line the insides with furring strips instead, like some sort of weird sauna.
Once you’ve built both sides, step back again and assess how you’d like the top to be. I originally wanted one side to follow the roof line, but we decided a straight cabinet across the top would be best and we could use the top to display our extra guitars.
As you plan and build your headboard bookcase thing, it’s important to think about what kind of storage you will be using…What size are most bins in the marketplace? What will I be storing on top? Is it heavy? Is it large? You don’t want to build cubbies that will not fit standard bins. For us the large open bottoms were going to hold our individual hampers, so I made sure to research cute hamper sizes first and built to suit.

We had a retro eggshell camper once. It was a 1979 Trillium that we refurbished, gentrified, used a handful of times, and sold to a hipster Brooklyn couple so that we could establish a deposit for the home we live in now. And I’m just now realizing 10 years later that our bedroom headboard bookcase thing was influenced by it. The top storage cabinet door we hinged at the top just like a camper kitchen!

If there is another piece of advice I have on any home project, is that the finishing needs to look expensive and meticulous. Your entire project can be a hot mess inside, but if you finish it well, it looks great! This is a perfect example. We chose finished hardwood planks for the front-facing trim and top cabinet and it really hid all of our imperfections. And there were lots of imperfections.

Caulk is your friend. Colored caulk in this situation even better. Using flooring for the wall worked great, but the corners and ceiling joints definitely benefitted from color-matched caulk in the seams. Remember, the finishing needs to be great. Or at least better than what’s underneath.

Sometimes, even the best-laid plans (which this definitely was not) still go wrong. I’d like to say we roll with it, but that wouldn’t be true. There are definite freak-out moments, usually when we’re tired and fed up and questioning every decision and then the pliers break (that’s a thing? Yes apparently). Or you make the wrong cut on that last piece of wood and you’ll be damned if you’re driving to Home Depot for the 3rd time that day.

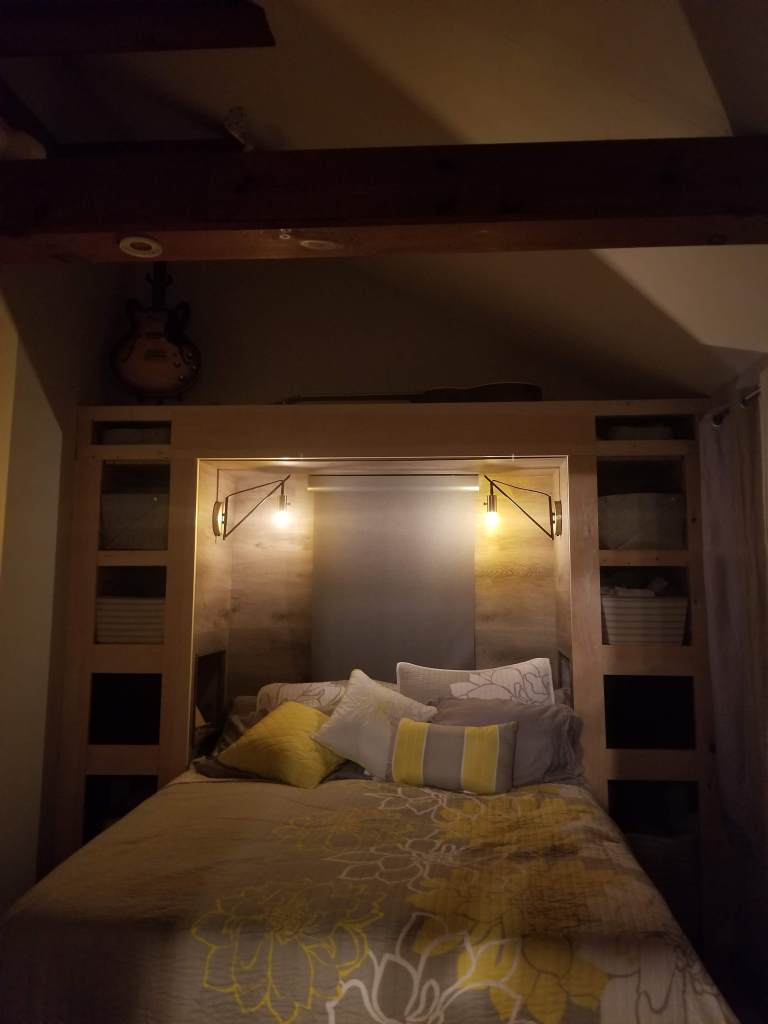
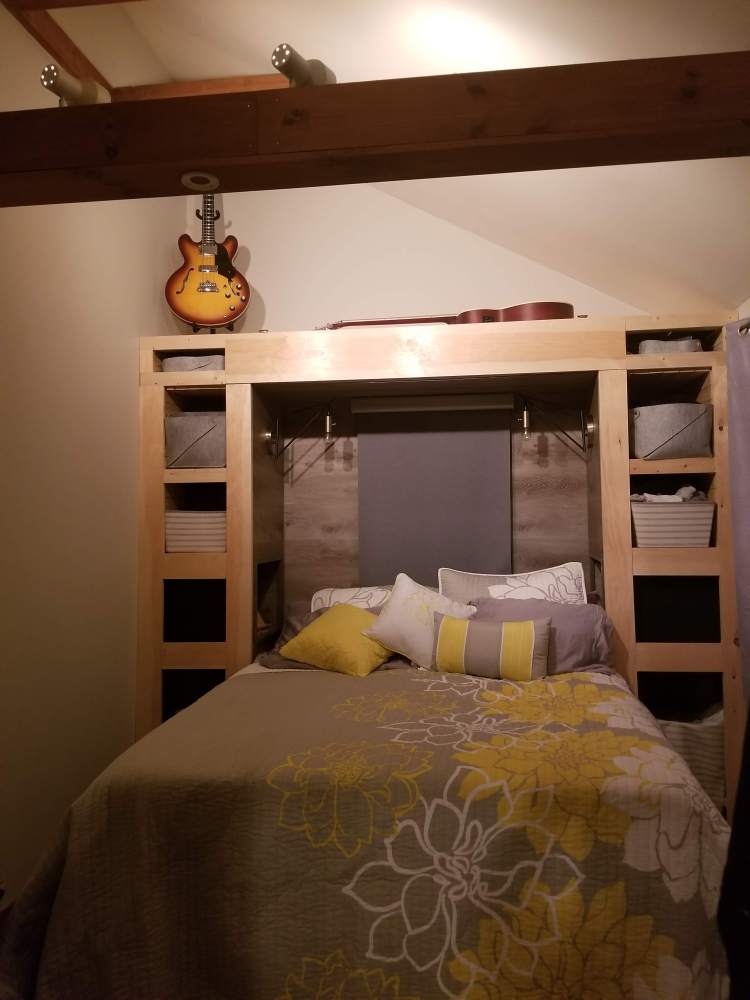
Buying the reading lights, new sleek window shade, matching bins, and hampers was the fun part. Look at how deceivingly organized it all looks! The final product was one of the most useful and pretty upgrades we’ve made so far. We now each have our own cubby nightstand within arm’s reach, our own reading lights, and plenty of individual plus common storage.
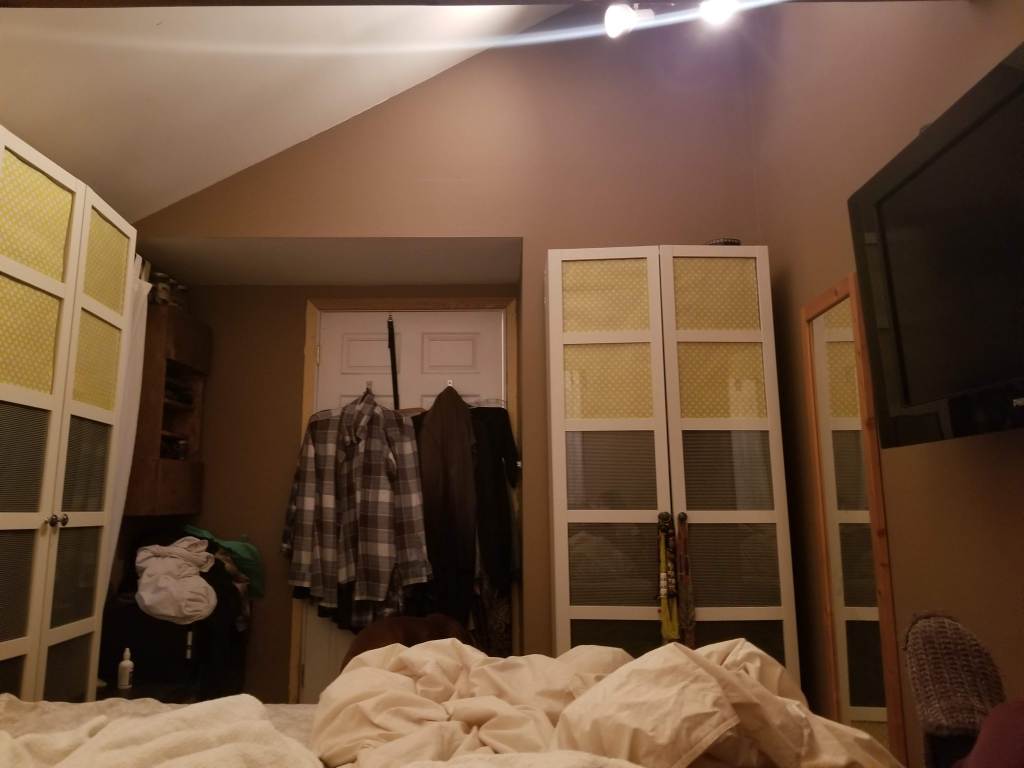
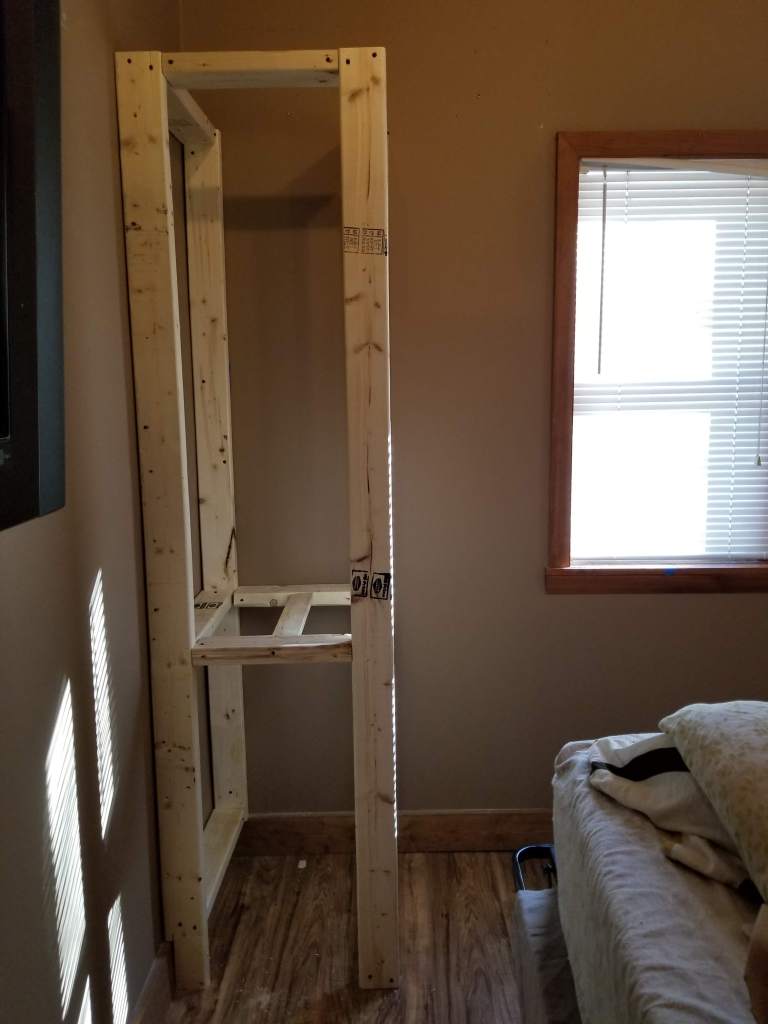
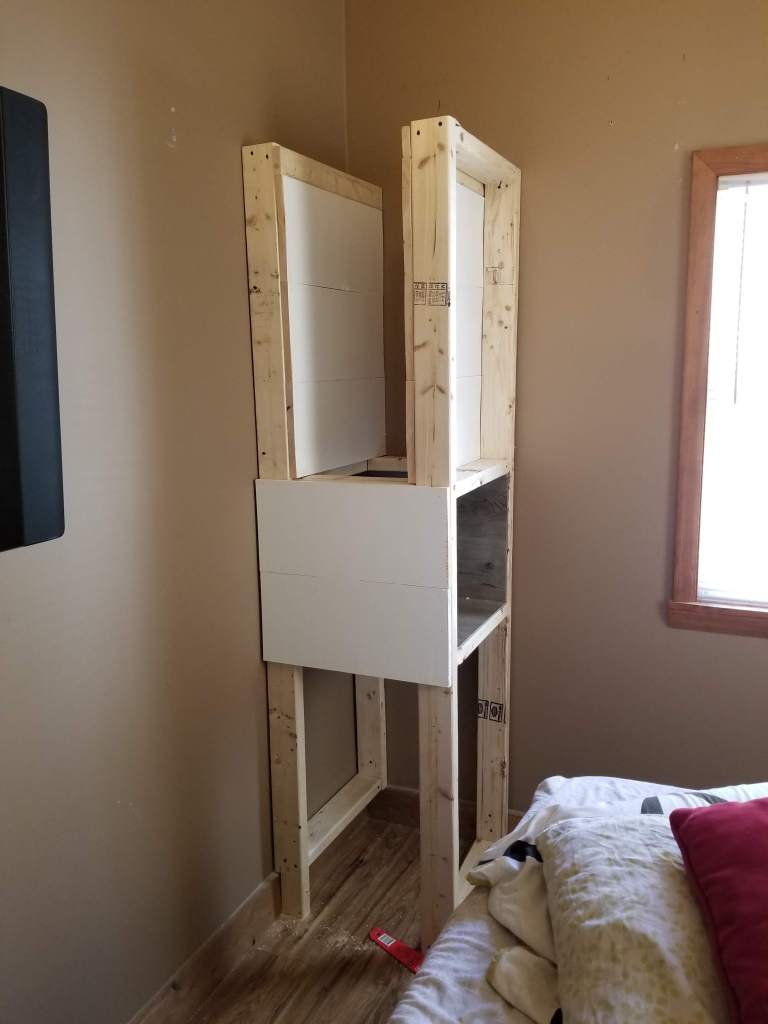
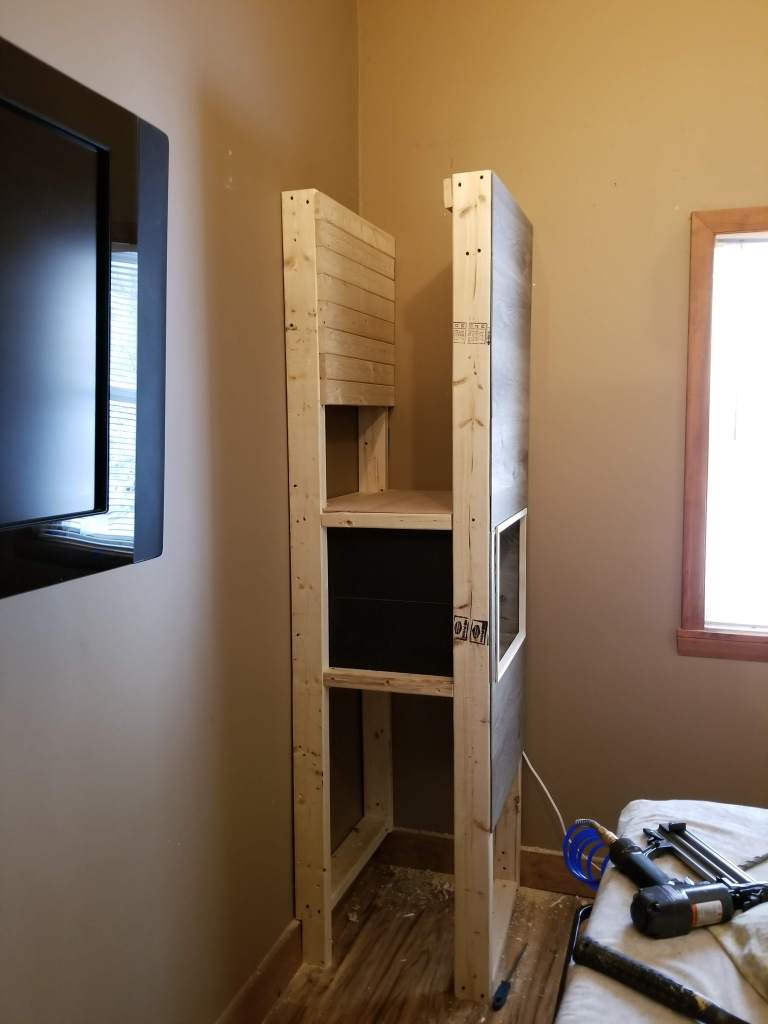
The last piece that is not related but kind of is, was the other side of the bedroom opposite the headboard. We had these Billy bookcases (Ikea again) with glass door fronts that we used for closets that had.to.go. So James built me a custom closet! It’s tiny and literally fits the width of hangers but was sooo needed and came out super cute. I had to add some pics of its progression.
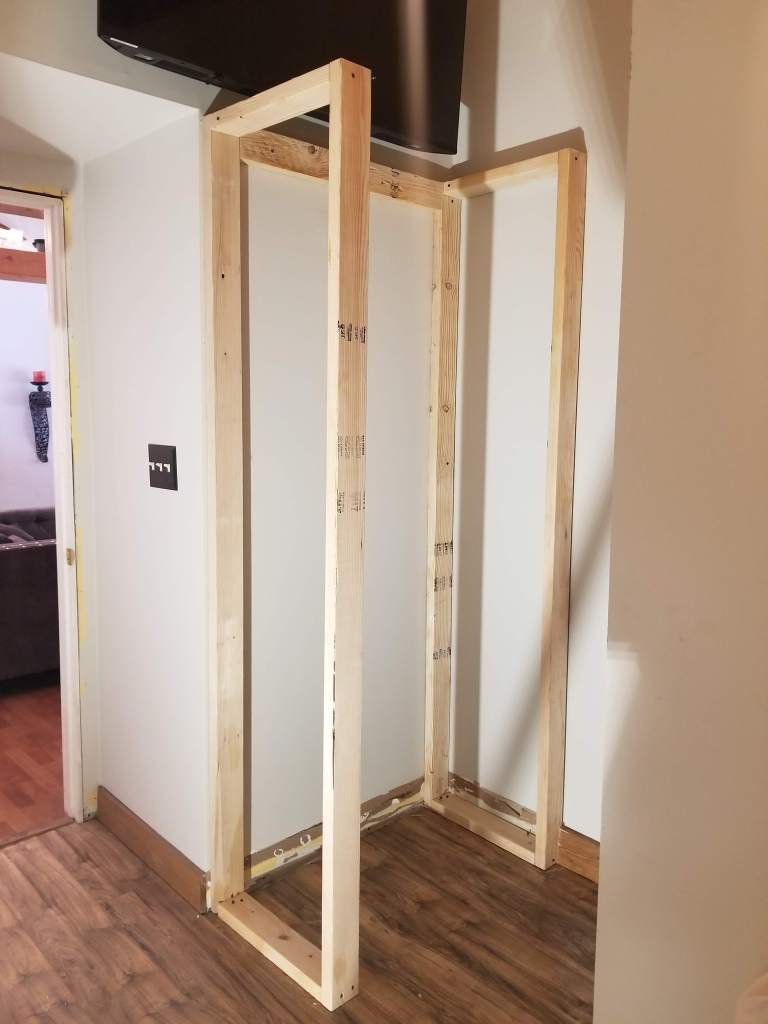

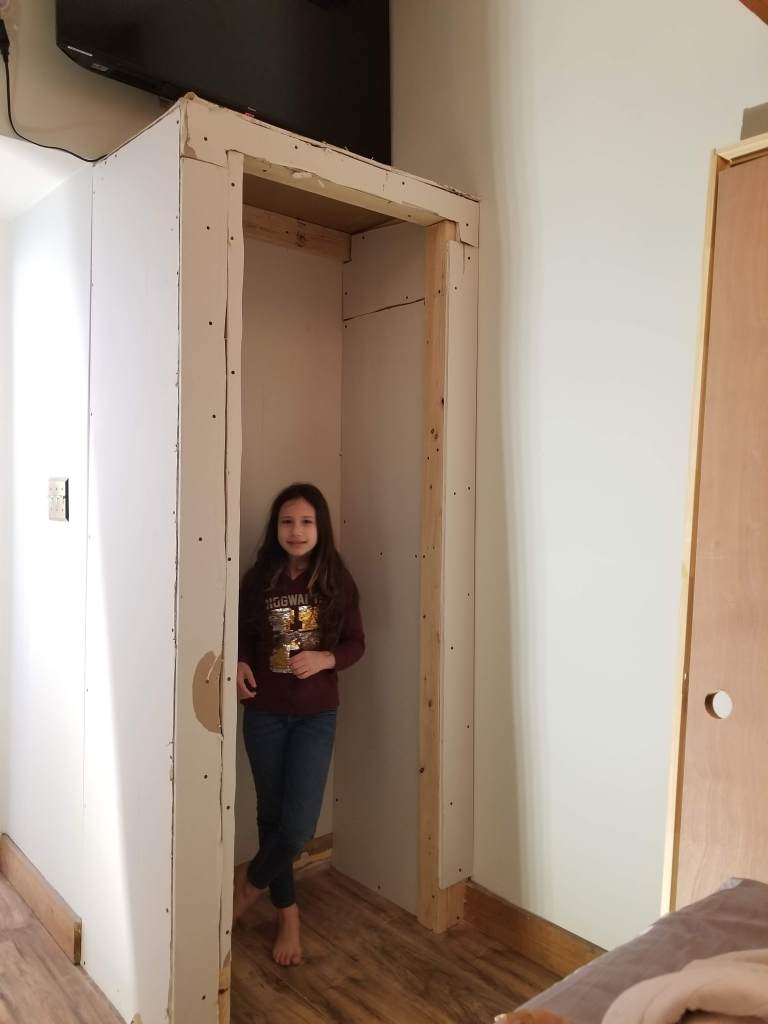
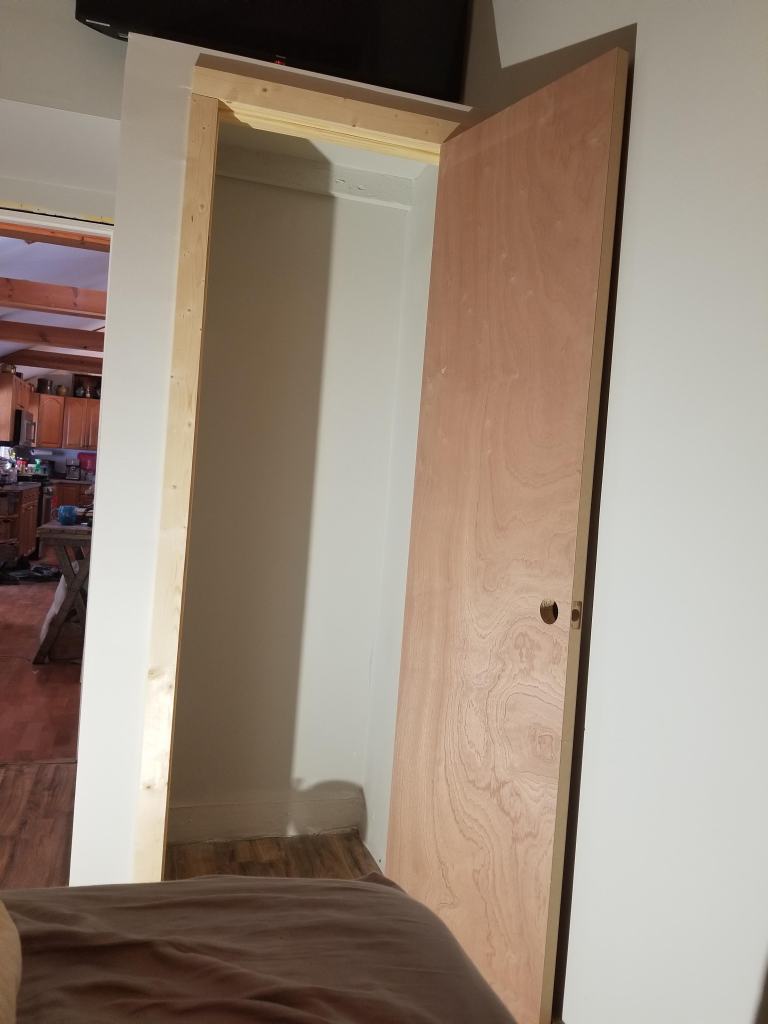
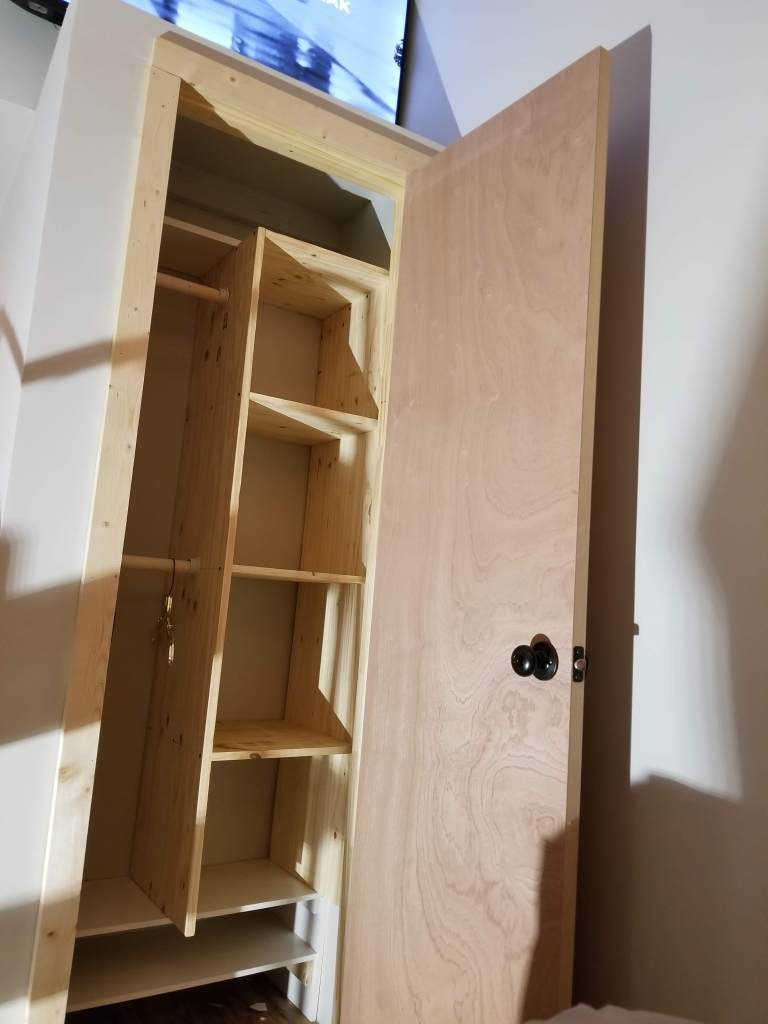
Again, 2 x 4’s are your friends when building. He framed out the closet, kid approved, and being the master at sheetrock/plaster that he is, he made it all look so amazing in the end.
So if you’re limited on space in the bedroom like we are, consider a bookcase headboard to replace your nightstands and go vertical. I’ve seen some really good examples of stacking premade bookcases (dare I mention Ikea again haha), so you don’t have to necessarily build custom. Just think outside the box, measure measure measure, and make sure you can return whatever you buy. You know, just in case mistakes are made, which is always ok!
